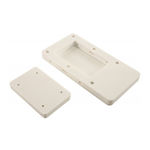

The Quick Release Bracket consists of a top and bottom plate.
Separate top and bottom plate to mount. Determine desired location
for mounting (either side can be used to lock the bracket.)
(see figure 1):
Insert locking clip firmly into preferred side. Using the 35 mm screws,
attach the top plate onto the bottom of trolling motor. Insert bolts from
the counter bore side. After the trolling motor, add a steel washer and
secure with the nylock nut. Tighten firmly with Allen wrench.
Bottom Plate
(see figure 2):
Using the bottom plate as a template,
mark and pre-drill 6 mm holes in desired
location. Using the 50 mm screws, attach
bottom plate to the boat. Insert bolts with
a steel washer from the counter bore side.
Add a nylon washer above and below the
boat. To complete, add a steel washer and
secure with the nylock nut. Tighten firmly
with the Allen wrench.
Attachment
(see figure 3 ):
Set top bracket over bottom bracket. Push the Pin
into holes on either side of locking clip to lock the
two plates together. Continue to push the Pin inward
until secured by the locking pin.
For security, insert a padlock (not included) in
locking clip to prevent removal of Pin (figure 4).
Detachment
(see figure 5):
Pull the Pin out of the top bracket. Lift and remove
motor from boat.
© 2014, MotorGuide
trolling motor
locking clip
bottom plate
For questions, contact Consumer Affairs at 1-920-929-5040
www.motorguide.com
1 - Top plate
1 - Bottom plate
1 - Hardware package
M6 x 50 mm socket cap screw
M6 x 35 mm socket cap screw
6.4 mm stainless steel washers
6.4 mm nylock nuts
6.4 mm nylon washer
5 mm Allen wrench
locking clip
Required Tools for Installation:
10 mm wrench
Power drill
6 mm drill bit
insert padlock here
69531 RevA

Our app is now available on Google Play